
Everything you need to run MissionaryConnect.
Step-by-step instructions for church administrators, missionaries, presenters, and volunteers. Built around the actual MissionaryConnect screens and controls.
Documentation
Quick Links
MissionaryConnect Docs / Church Administration
Managing Your Church
Use the Manage area to control your church profile, members, missionary tools, analytics, invitations, prayer requests, and display-related settings. This guide explains what each page does and how to use it.
Path: Open your church page → select Manage. Owners, Admins, and Staff typically see this button.
Getting Started
- Go to missionaryconnect.app/login.
- Enter your email address and password.
- Use Remember me when this is a trusted church device.
- Select Forgot password? if you need a reset.
- After signing in, use the top navigation for Home, Churches, Missionaries, Videos, the 9 Block Menu, and your avatar menu.
Church Administration
Settings
Manage → Settings controls who can see your church page and which public sections are available.
- Public — anyone can view the church page.
- Members only — only signed-in church members can view it.
- Private — restricted to the owner.
You can independently show or hide the About, Photos, Videos, Posts, and Missionaries sections. A section appears publicly only when it is enabled and has content.
KJV Only
Use the KJV Only church setting when appropriate for your church.
KJV Bible Verse of the Day
Scheduled for Fall 2026. Pre-release training may reference this feature before general availability.
MC Tracker
Scheduled for Fall 2026. MC Tracker is being documented from pre-release workflows so the manual is ready when the feature launches.
Analytics
Open Manage → Analytics to review Missions Display engagement. Choose a date range from the available filters, such as the last 7 days through the last 12 months.
- Content Library shows the makeup of your display content.
- Profile Engagement shows viewing time, session count, and popular profiles.
- Additional Pro analytics can include Activity Trends, Activity Overview, Content Consumption, and the Engagement Funnel.
Invitations, Join Requests, and Users
Invitations: invite someone by email or generate a QR code so a person present at church can join.
Join Requests: review each person’s name, email, and how they identified themselves, then select Accept or Deny.
Users: view the membership roster, role, join date, and email. Authorized editors can change a role or remove a user.
- Owner — full control, including transfer or deletion.
- Admin — full church and display management.
- Staff — trusted helpers with reduced settings permissions.
- Member — congregation member connected to the church.
- Missionary — missionary account connected to the church.
Missionary Management
Open Manage → Missionaries or Missions Display → Curate Missionary Profiles.
Use the search field, filter by All / Managed / Self-Managed, and switch between List and Card layouts. Each missionary can be On display or Hidden.
The ⋮ menu provides actions including Manage Profile, Curate Profile, Hide from Missions Display, and Kill Switch. Pro churches may also see MC Tracker here.
Curate Profile: what every button does
- Testimony / Biography — opens or edits the missionary’s testimony/bio source.
- Images — select an existing image, reposition it, scale it, and choose its background.
- Prayer Letters — move published letters between Available and On Display; drag to reorder.
- Videos — move available videos onto the display and reorder them.
- Contact Info — controls the Scan & Connect information reached through the QR code.
- Prayer Card — select the prayer-card image shown on the display.
In the Curate screen these six areas remain visible even when empty. On the live display, empty content buttons stay hidden.
Missions Display
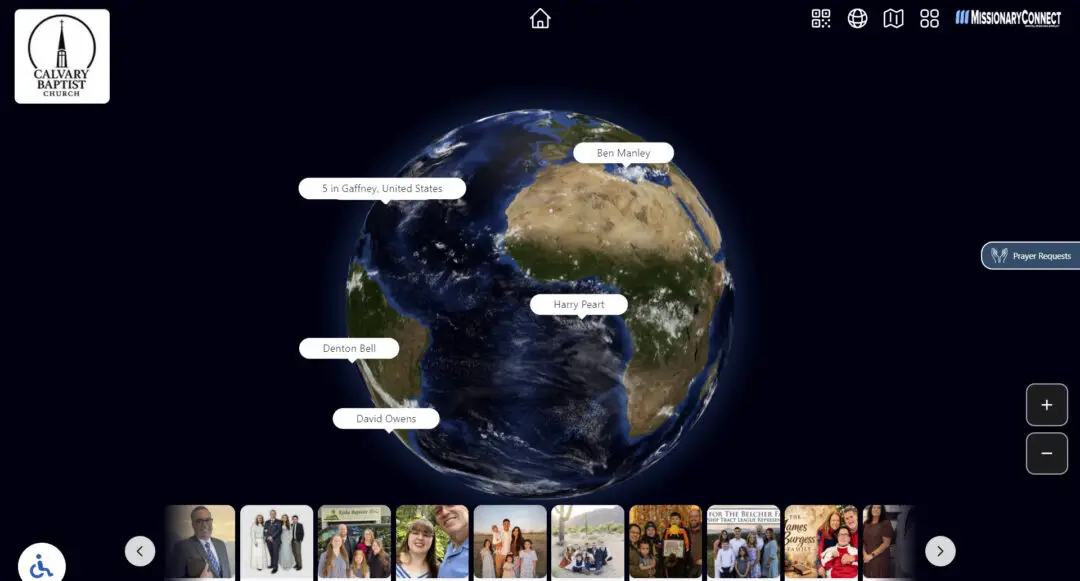
From a church page, select Missions Display. The menu contains four major actions: Edit Display Settings, Curate Missionary Profiles, Prayer Requests, and Activate on this device.
Edit Display Settings opens the builder with a live preview and a settings sidebar. Save changes in the relevant panel. Where MissionaryConnect shows ACTIVATE MAP, use it to publish that map configuration.
Display Builder controls
- Preview Screen — preview at 1080p, 1440p, 4K, 720p, or XGA.
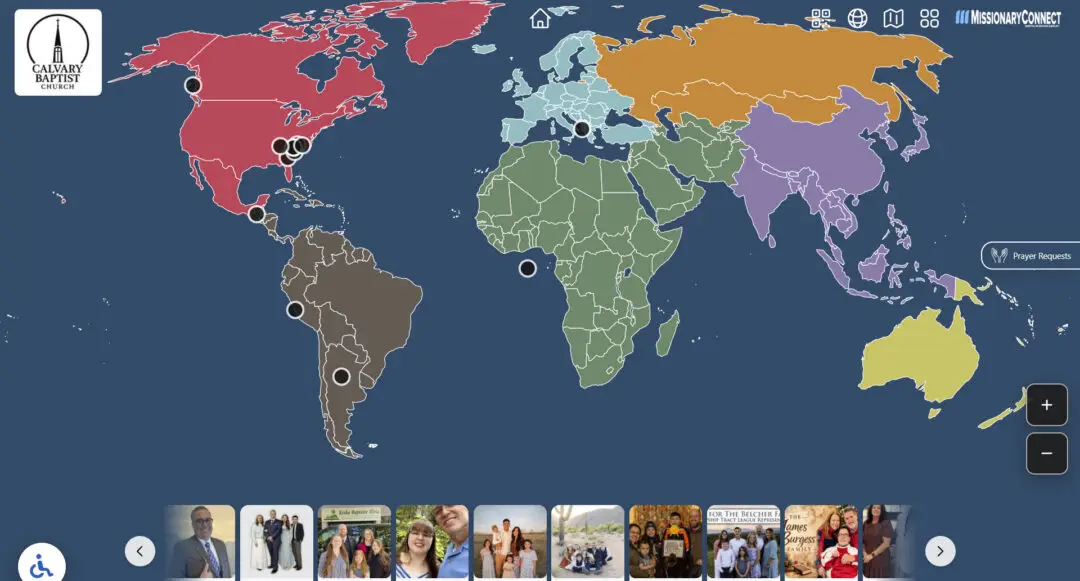
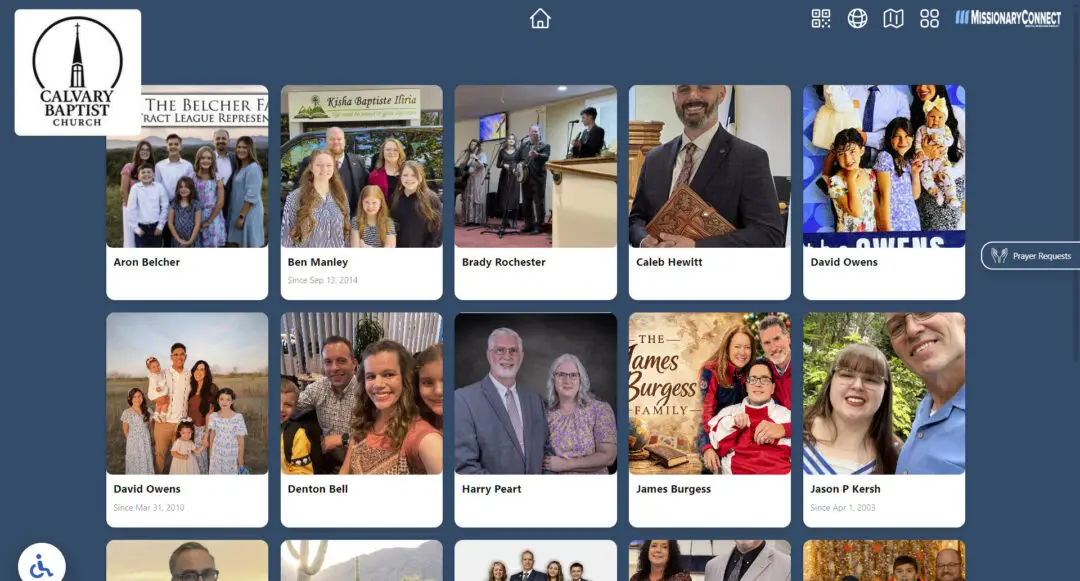
- Views — turn Globe, Flat Map, and Grid on or off. At least one view must remain enabled.
- Markers — choose how missionaries appear on each map.
- Colors — set Flat Map background and MissionaryConnect menu/icon colors.
- Logo — resize the church logo and optionally use view-specific logos.
- Menu — show/hide the display menu and control its size.
- Accessibility — enable the wheelchair-accessibility button and configure its colors, size, and position.
- Filmstrip — adjust the vertical position of the scrolling missionary-photo strip.
- Prayer Requests — set a title and rich-text prayer message and choose whether it appears.
- Modal — configure the missionary pop-up, optional country-info opening screen, colors, buttons, and backdrop dimming.
- Buttons — rename Testimony, Images, Prayer Letters, Videos, Contact Info, and Prayer Card; set button colors and the shared new-content indicator color.
- Videos — control autoplay for directly uploaded videos.
- Screensaver — configure theme, font, idle delay, video volume, preview, active screensavers, and slide order.
- PIN — controls the church’s display-exit PIN.
- Activate on this device — turns the current browser/device into the live Missions Display.
Scavenger Hunt
Upcoming Fall 2026 feature. Final controls and instructions will be added when the release workflow is finalized.
Screensaver workflow
- Open Screensaver in the display builder.
- Choose the overall Theme and Font.
- Set Starts after to the desired idle time.
- Set the default video volume and use Test sound if needed.
- Use Preview Screensaver to test immediately.
- Move a screensaver from Available to On Display; drag to reorder multiple screensavers.
- Select New Screensaver to create another.
- Each screensaver card can provide Edit slides, Hide, and Delete.
When adding a slide, choose whether it represents a Church or Missionary, choose available media, then optionally add a title and rich-text body.
Account & Profile
The avatar menu provides Profile, Account, Help & Support, Privacy, and Log out. Your Account page controls login details such as name, email, and password. My Churches lists each church you belong to and your role in that church, and provides the Create Church action when available.
Kiosk & Hardware
This section will contain device-specific guides for Windows kiosk mode, Android kiosk mode, touchscreen startup, Wi-Fi, restart procedures, and Sunday-morning recovery. The public manual should keep these instructions separate from church administration so volunteers do not have to sort through backend settings.

Troubleshooting
Start with the symptom, not with technical terminology. The dedicated Troubleshooting Guide covers touchscreen response, missing updates, browser bars, display mode, and profile visibility.
Advanced
Advanced documentation will cover API keys, integrations, notification behavior, platform-administrator controls, and other features that ordinary church volunteers do not need. Keeping these topics separate is intentional.
