Are you tired of the Spam from your forms? Are you getting more Spam than meals in a day? If you’re doing that right thing by
using WordPress for your website, then WPForms ReCAPTCHA is the answer for you! Below you will find step by step instructions on how to protect your website forms submissions from Spam.
Digital Missions Display has been using WPForms and their add-ons since the beginning in 2016! It’s the only form software used by our parent company, Douglas Web & Graphic Design, Inc.
So let’s begin!
Why Use reCAPTCHA?
1. Block spam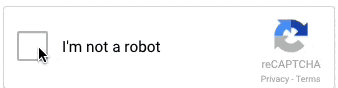 – By verifying that a human being is submitting a form to your WordPress website, all automated spam attempts are blocked. The added security can also make users feel that the form is secure and help reduce form abandonment.
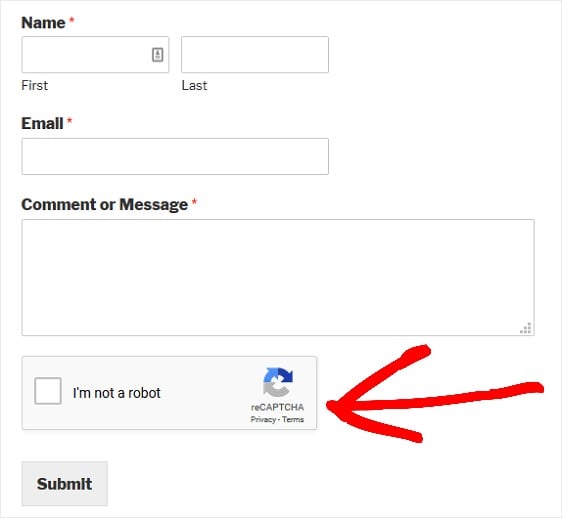
2. Easy to use – Originally CAPTCHA was created to do two things at the same time: help machines translate non-digital books and fight spam. But, the jumbled text was difficult for users to answer correctly. Google has since improved their CAPTCHA tool, with reCAPTCHA v2 to be much easier for users. Now instead of entering text, users can just put their mouse over the checkbox and the tool understands that this is not an automated spam bot. This is much easier for users to prove that they are not robots.
In the fall of 2018, Google released something called reCAPTCHA v3, which uses a behind-the-scenes scoring system to help you detect abusive traffic all over your website without asking users to do anything. reCAPTCHA v2 has two options, interactive checkboxes and invisible reCAPTCHA. This guide will focus on adding reCAPTCHA v2’s interactive checkboxes or invisible reCAPTCHA to your WordPress forms.
How to Add a reCAPTCHA Checkbox to Your Forms
Let’s see how to add an interactive reCAPTCHA checkbox to your contact forms.
Step 1: Create a Simple Contact Form in WordPress
The first thing you’ll need to do is install and activate the WPForms plugin. For more details, see this step by step guide on how to install a plugin in WordPress.
Next, you’ll need to create a WordPress contact form. For help with this step, check out WPForms tutorial on how to create a simple contact form in WordPress.

Step 2: Configure reCAPTCHA Settings
Next, you need to configure reCAPTCHA settings in WordPress.
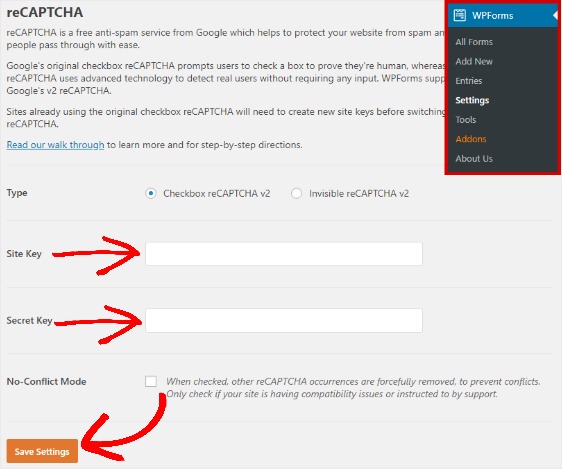
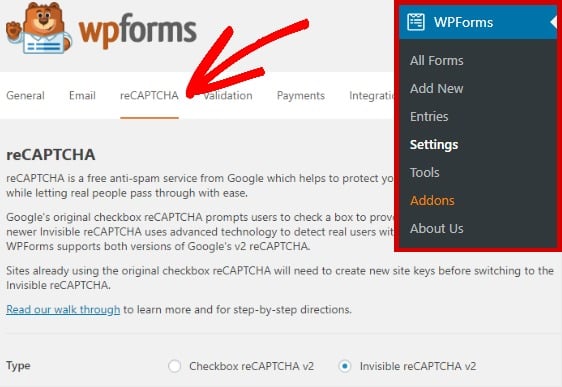
To start, go to WPForms » Settings. Then, click on the reCAPTCHA tab.

Choose v2 reCAPTCHA to add an interactive reCAPTCHA box to your contact form.

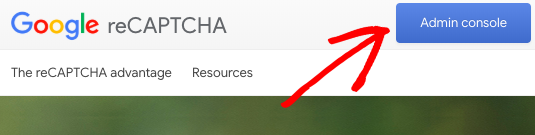
reCAPTCHA is a service provided by Google. It’s free, but requires a site key and secret key. You can easily generate those keys for your site by visiting Google’s reCAPTCHA setup page.
Once you’re on this setup page, click on the Admin console button in the top right corner.
Then, sign in to your Google account.
After logging in, you’ll be redirected to a page where you can register your site for reCAPTCHA.
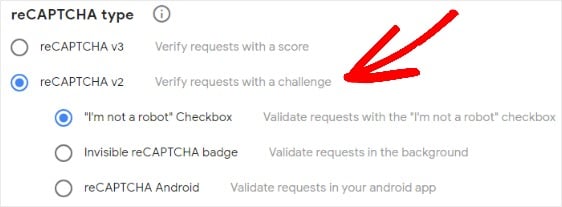
If you’ve already registered a website for Google reCAPTCHA in the past, you’ll see a different screen. In that case, just click on the plus sign to Register a new site.

Enter the name of your website in the label field. This is for your own use, so that you can identify the website if you ever needed to get the keys again.

Then, choose the type of reCAPTCHA you want to add to your website. In this example, we’ll select reCAPTCHA v2 and then the “I’m not a robot” Checkbox.
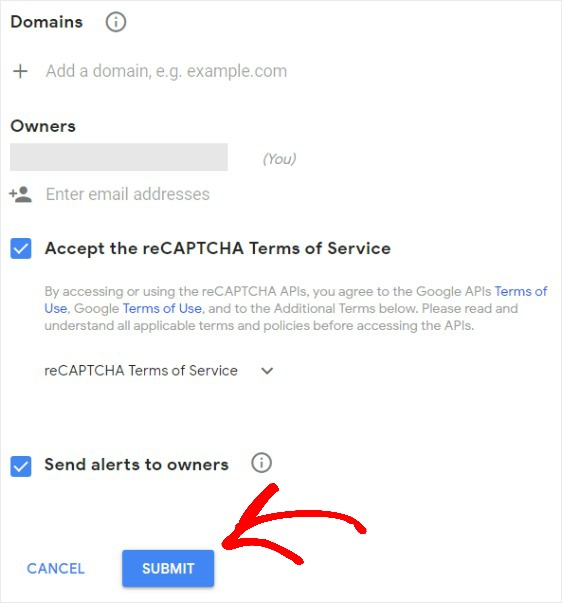
After that, you need to add your website’s domain, such as example.com.
To save your site, click the Submit button.
Next, you’ll see a page with a site key and secret key for your website.

Copy your site and secret key, and switch back to the WPForms » Settings page. Paste your site and secret keys under the reCAPTCHA settings.
Click on the Save Settings button to store your changes.
Step 3: Add reCAPTCHA to Your Contact Form
Adding reCAPTCHA to your WordPress form is easy to do.
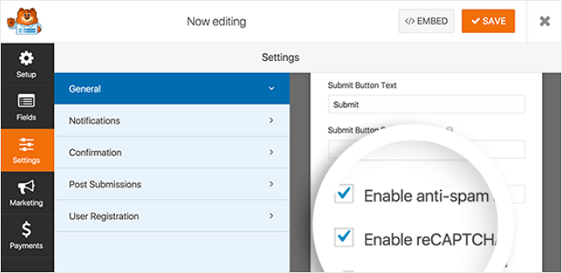
To enable reCAPTCHA in the simple contact form you created earlier, go to Settings » General in the form editor.
At the bottom, check the box next to Enable Google Checkbox v2 reCAPTCHA.
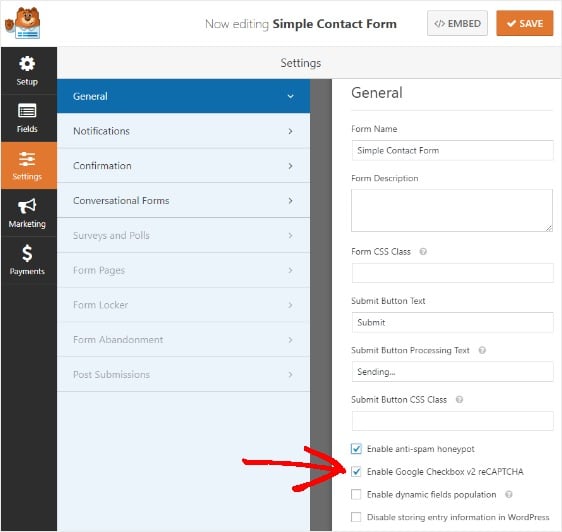
Lastly, click Save.
Now you can add your contact form, complete with Google reCAPTCHA, to your website.
Step 4: Add Contact Form with reCAPTCHA to WordPress
WPForms allows you to add your forms to many locations on your website, including your blog posts, pages, and even sidebar widgets.
Let’s take a look at the most common post/page embed option.
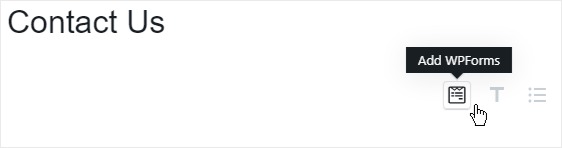
To start, create a new post or page in WordPress and then click on the Add WPForms icon inside of a block.
Next, select your form from the dropdown in the modal popup.
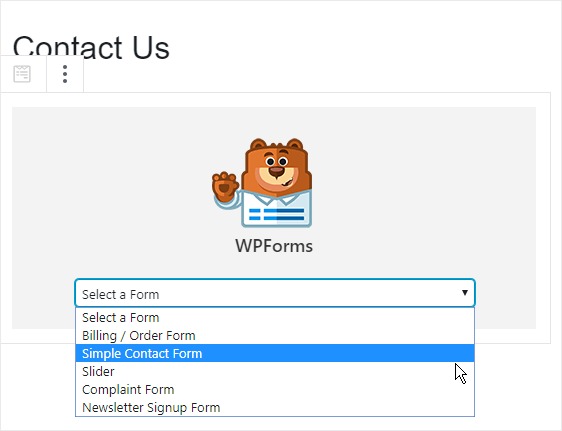
Then, publish your post or page so your form will appear on your website.
Want to add an icon with extra info to a form field? Head over to our tutorial on how to add Tooltips in WordPress forms.
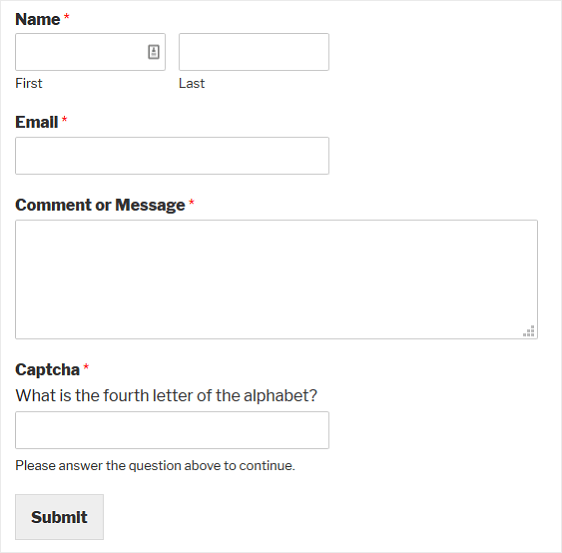
How to Use the WPForms Custom Captcha Addon
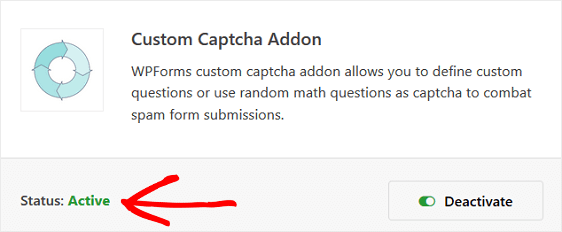
If you don’t want to use Google reCAPTCHA, but know you want to add an interactive reCAPTCHA element to your website, you can always use our Custom Captcha Addon.
With this addon, you can define custom questions or use random math questions as CAPTCHA to fight spam form submissions.
Step 1: Create a Simple Contact Form in WordPress
The first thing you’ll need to do is install and activate the WPForms plugin. For more details, see this step by step guide on how to install a plugin in WordPress.
Next, go to WPForms » Addons and find the Custom Captcha Addon.
Install and activate the Custom Captcha Addon.
Next, you’ll need to create a WordPress contact form. For help with this step, check out our tutorial on how to create a simple contact form in WordPress.
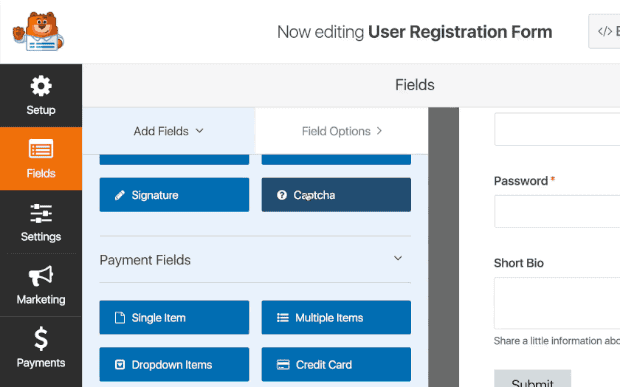
Step 2: Add and Customize the Captcha Form Field
Once you’ve created a contact form, stay in the form builder to add your custom captcha form field.
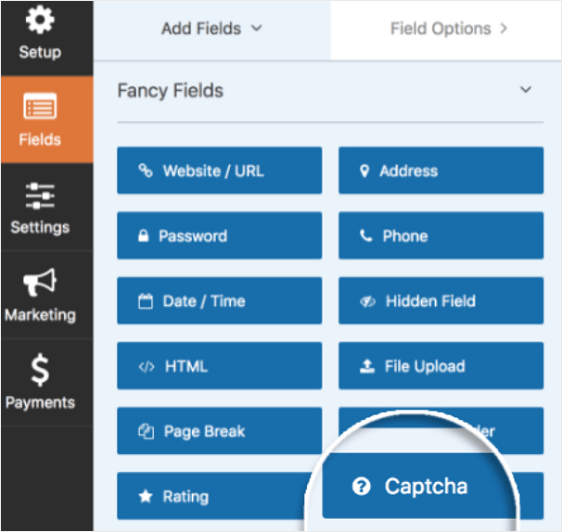
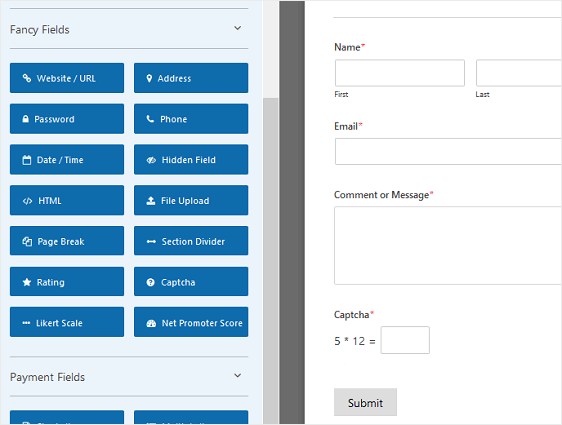
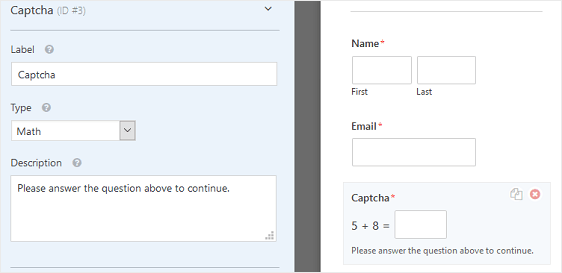
Just drag it from the left hand panel to the right hand panel to add it to your form. The form field will automatically display a random math question for site visitors to answer before they can submit their form on your site.
A new addition, subtraction, or multiplication problem will appear every time the page loads or refreshes.
For help customizing the Math Captcha, check out our documentation on how to change the Math Captcha.
To make changes to the form field, click on it.
Now you can change the label, type of captcha, and add a description.
If you prefer to use a custom question and answer instead of the Math Captcha, change the type of captcha to Question and Answer in the Field Options section.
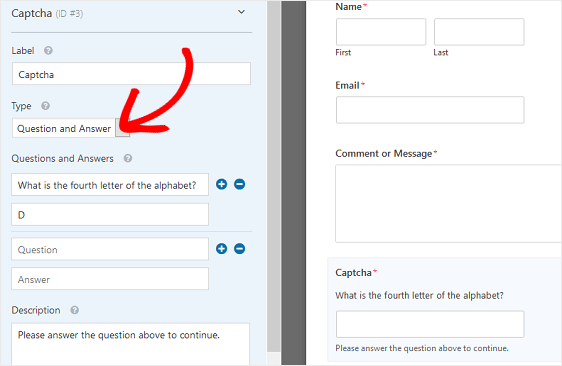
There, you can also change the question and answer that site visitors have to answer to submit their form on your site.
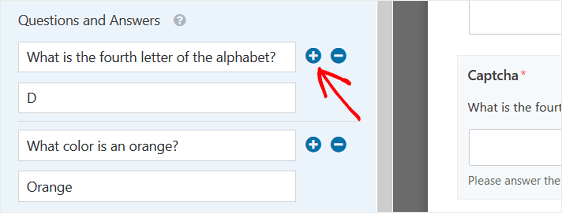
If you want to display random questions and answers every time your page loads or refreshes, click on the plus (+) button to add another question and answer.
Click Save when you’ve customized your custom captcha.
You’re now ready to add your contact form to your website.
Step 3: Add Contact Form with Custom Captcha to WordPress
WPForms allows you to add your forms to many locations on your website, including your blog posts, pages, and even sidebar widgets.
Let’s take a look at the most common post/page embed option.
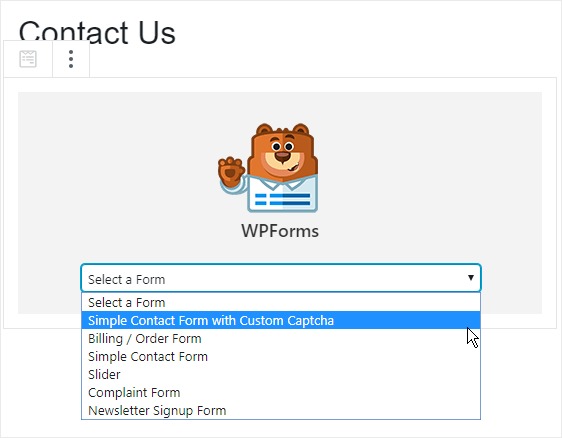
To start, create a new post or page in WordPress and then click on the Add WPForms icon inside of a block.
Next, select your form from the dropdown in the modal popup.
Then, publish your post or page so your contact form will appear on your website.
How to Build a Spam-Free Contact Form Without CAPTCHA
Here we’ll show you how to build a spam-free contact form in WordPress without CAPTCHA so the user experience is never disrupted and filling out your forms is as easy as possible.
Why Not Use CAPTCHA?
To protect your site, you want to make it as easy as you can for your visitors to fill in your contact form while making it as hard as possible for spambots to get through your security.
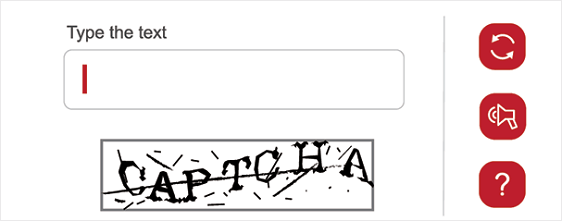
One of the most common ways to stop spambots is to use a form field that only a human could answer, called CAPTCHA.
CAPTCHA usually requires users to enter specific text into a box.
Though the WPForms Custom CAPTCHA Addon works a bit differently by creating a field that asks a user to solve a simple math problem or answer a question correctly, this can still be an extra step that frustrates the user and may decrease form submission rates.
Users may not want to take the time to answer irrelevant questions. And, some users may have difficulty answering math questions or reading CAPTCHA text, especially if they have dyslexia or other disabilities.
Fortunately, it’s easy to create a spam-free contact form without CAPTCHA using WPForms.
How to Add an Invisible Recaptcha Checkbox to Your Forms
Now, let’s see how to add an interactive reCAPTCHA box to your contact forms.
Step 1: Create a Simple Contact Form in WordPress
The first thing you’ll need to do is install and activate the WPForms plugin. For more details, see this step by step guide on how to install a plugin in WordPress.
Next, you’ll need to create a WordPress contact form. You can make a simple contact form or even a multi-step form in WordPress. For help with this step, check out our tutorial on how to create a simple contact form in WordPress.
Step 2: Configure reCAPTCHA Settings
Next, you need to configure reCAPTCHA settings within WordPress.
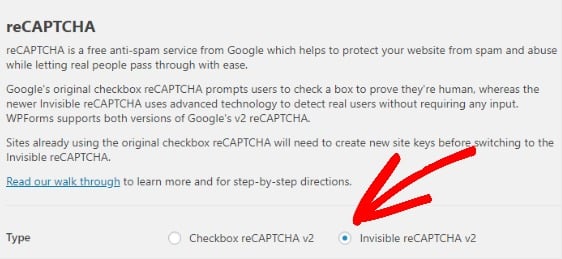
To start, go to WPForms » Settings. Then, click on the reCAPTCHA tab.
Choose Invisible reCAPTCHA to add Invisible reCAPTCHA to your contact form.
reCAPTCHA is a service provided by Google. It’s free but requires a site key and secret key. You can easily generate those keys for your site by visiting Google’s reCAPTCHA setup page.
Once on the site, click on the Admin console button in the top right corner to continue.
You’ll be asked to sign in with your Google account. After logging in, you’ll be redirected to a page where you can register your site for reCAPTCHA.
If you’ve already registered a website for Google reCAPTCHA in the past, you’ll see a different screen. In that case, just click on the plus sign to Register a new site.
Enter the name of your website in the label field. This is for your own use, so that you can identify the website if you ever needed to get the keys again.
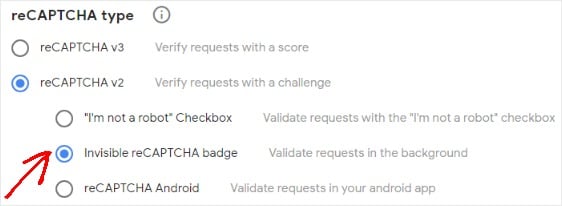
Then, choose the type of reCAPTCHA you want to add to your website. In this example, we’ll select Invisible reCAPTCHA badge.
After that you need to add your website’s domain, such as example.com.
To save your site, click the Submit button.
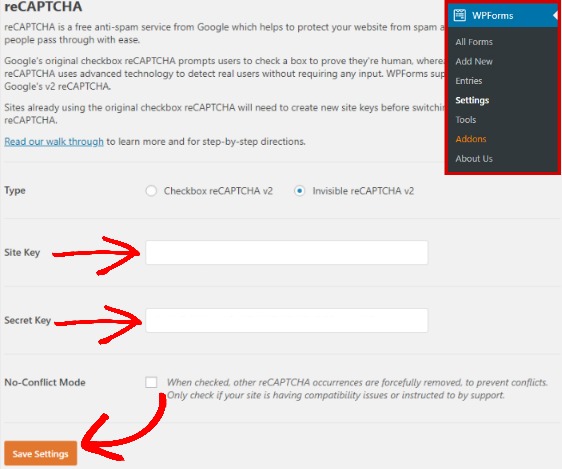
Next, you’ll see a page with a site key and secret key for your website.
Copy your site and secret key, and switch back to the WPForms » Settings page. Make sure Invisible reCAPTCHA v2 is selected for Type.Paste your site and secret keys under the reCAPTCHA settings.
Click on the Save Settings button to store your changes.
Step 3: Enable Invisible reCAPTCHA on Your Contact Form
To enable the Invisible reCAPTCHA on your contact form, go to Settings » General in the form editor.
Then, scroll down and click the Enable Google Invisible reCAPTCHA checkbox.
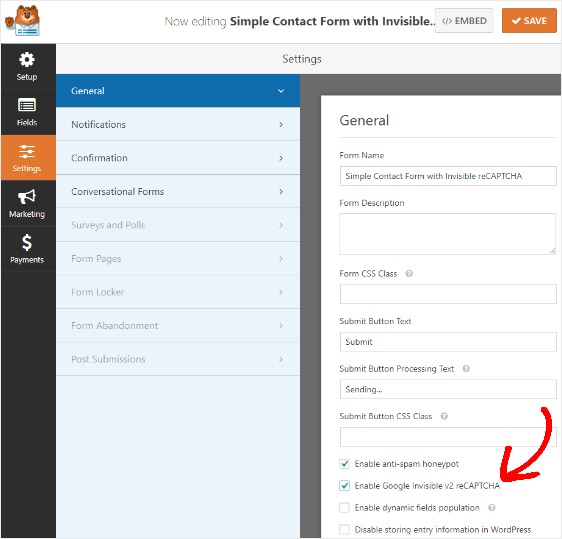
Click Save.
Now any time someone tries to submit a form on your website, Google will determine whether it’s a spambot trying to submit a fake form or not. Your users, however, will never see anything related to captcha and will simply submit their form without any issue.
Added Bonus: How to Enable Anti-spam Honeypot
There is a hidden way to secure your contact forms without using CAPTCHA of any kind in WPForms. This hidden tool is called a honeypot.
Basically, a spambot fills in a hidden field that valid users can’t see. This extra field of data verifies that the submitter is a spambot, not a user.
When the honeypot field is filled in, the form is rejected as spam. The spambot gets stuck and can’t submit the form.
Honeypots are great because they don’t bother users like a CAPTCHA field and they are a secure tool for stopping spambots.

By default, this setting is enabled for all your forms, even if you use other anti-spam strategies such as Google reCAPTCHA, the Custom Captcha addon, or Invisible CAPTCHA.
If you want to double-check that it’s activated, you can go to Settings » General.
Then, near the bottom of the right-hand preview panel, you’ll see that the Enable anti-spam honeypot option is selected for you.
In Conclusion
Get started with the most powerful WordPress forms plugin today.
The content for this post was generated by WpBeginner and WPForms original content